Recipes

Recipes

Theatre reviews

Recipes

Science of baking

Recipes

Bakery Reviews

Recipes (or add your own index title)

Cakes

Recipes (or add your own index title)

Biscuits

Recipes (or add your own index title)

Tarts, pies and other pastries

Recipes (or add your own index title)

Breads

Recipes (or add your own index title)

Others

Tuesday 30 October 2012

Chocolate cream profiteroles (cream puffs, choux a la creme)


Shop bought profiteroles tend to have a slightly crispy and dry pastry shell, but home baked ones are a little lighter and fluffy inside and should have an almost melt in your mouth texture. It contains no raising reagent, but instead it is extremely wet, so the steam trapped inside the pastry will make it expand. Also the butter should help to make the pastry rise just like a puff pastry. 

Ingredients (makes about 30 large buns)
  • 200ml cold water
  • 85g unsalted butter
  • 5g caster sugar
  • pinch of salt
  • 115g sifted plain flour
  • 3 medium eggs 
  • 70g milk chocolate
  • 100ml double cream
  • 30g dark chocolate
  1. Pre-heat oven to 200 degrees, this is VERY important, the temperature must be high enough when the pastry goes in
  2. Mix water, sugar and butter together in a saucepan and melt the butter over medium low heat, stir occasionally 
  3. Once butter has completely melted and the water is boiling, give the mix a good stir and add a pinch of salt and stir again
  4. Switch up heat to medium and add the sifted flour and mix it into the water. The flour should soak up the liquid quite quickly, keep stirring until the batter has become a thick paste/dough
  5. Remove the paste from heat and let it cool down for about 30 minutes at room temperature
  6. Beat the eggs and add a quarter to the batter and fold it in until it is all mixed, repeat the process until the batter is shiny and just drops off from the mixing spoon (N.B. You may not need all the eggs, in fact, it is likely you won't need all the eggs)
  7. Pipe the batter onto a sheet of baking parchment, I used a 2p coin as reference size
  8. Use a wet finger to press down the peak on the choux bun to give a flat surface and prevent the peak from getting burnt 
  9. Bake for 25-30 minutes, the choux bun should have risen and turned slightly golden brown 
  10. Remove from the oven and use a thin skewer to make a hole at the bottom of the choux bun to  allow the steam to escape 
  11. Put the buns back in the oven for another 5 minutes to dry off the inside 
  12. Leave at room temperature to cool 
  13. Melt the milk chocolate over simmering water
  14. Whip the cream until stiff and fold the melted milk chocolate into it to make the chocolate cream, use a piping bag with thin nodule to pipe the cream into the choux buns, make sure the buns are properly filled 
  15. If you don't have a piping bag or nodules, slice choux bun in half and fill it this way
  16. Melt the dark chocolate and pipe stripes of the chocolate over the profiteroles to finish

Monday 29 October 2012

Viennese fingers


Viennese fingers, viennese fingers...hmmm, nope, can't think of anything clever with this. Except that it looks like a finger with black nails??? For all you people who are thinking of weird things right now, STOP thinking anything disgusting! Anyway, let's crack on with this.

Ingredients (20-25 biscuits)
  1. 100g unsalted butter
  2. 30g icing sugar
  3. 110g plain flour
  4. 50g plain chocolate
  • Weigh out butter and let it warm up to room temperature, this will soften the butter 
  • Once butter is soft, pre-heat oven to 180 degrees 
  • Mix in the icing sugar into the butter until it becomes pale and fluffy
  • Sift in the flour and mix until it is all combined
  • Pipe the mixture into whatever shape you want onto a piece of baking parchment 
  • Bake for 12-20 minutes, the surface should be golden brown 
  • Take it out of the oven to cool. This biscuit is quite crumbly so be gentle when you take it out of the oven
  • Once biscuits have cooled, melt chocolate over simmering water 
  • Dip one end of the biscuit into the chocolate and magic! Here's your viennese fingers! 

Saturday 27 October 2012

apple custard cake

This is a very simple cake, genoise, custard and cream. Nothing out of the ordinary and it's definitely something everyone can whip up in 2 hours, ok, maybe 2 and a half or 3. But, it's worth every effort. My family loves apples, especially crunchy ones, so I've made an apple custard for the filling of this cake.

Ingrdients:
  • 6 large eggs
  • 125g self raising flour (or plain flour if you prefer the more traditional genoise, but honestly, self raising flour rises better, but over, the difference is not THAT big)
  • 175g caster sugar
  • 50g unsalted butter
  • 3 granny smith apples
  • 1 pink lady apple 
  • 50g corn flour
  • 5 tbsps milk 
  • 250ml double cream
  • An electric whisk, this is absolutely essential
  1. Weigh out sifted self raising flour and leave aside
  2. Weigh out butter and let it soften at room temperature for 30 minutes, you want this to be VERY soft but not melted
  3. Pre-heat oven to 180 degrees C and line 2x18cm round cake tins, yes, this is going to be quite a tall cake 
  4. Put 4 eggs into a large mixing bowl with 125g caster sugar and whisk over a pan of simmering water, careful not to cook the eggs whilst you are whisking
  5. Eventually, the eggs/caster sugar batter will at least triple or even quadruple in volume and thicken. You should keep whisking until the batter comes off the mixer and leave a trail of ribbon behind it and the colour at this stage should be very pale yellow, almost white
  6. Add the sifted flour into the batter and very gently fold it in
  7. Add in the butter and fold it in until everything has combined or became equally distributed
  8. Divide the cake mixture into the two cake tins evenly and bake for 20-25 minutes, when it's done, the edges will shrink away from the parchment paper slightly, test with a clean knife or skewer to see whether it's done inside, it should come out completely clean
  9. Take the sponges out of the oven and cool inside the tin for 5 minutes and then take it out and cool on a wired rack
  10. Divid each sponge horizontally into 2 equal pieces and cool completely
  11. Whilst you are waiting for the sponge to cool, skin and core the granny smith apples and chop into small pieces and blend until you get a puree
  12. Mix puree with 5 tbsps of milk  and put it in a saucepan over low heat until it simmers
  13. Mix 2 eggs with 50g caster sugar until well combined and then mix in the corn flour and repeat the mixing process until the mixture is smooth and silky
  14. Once everything has mixed, add in a tbsp of the hot apple puree into the egg mixture and mix
  15. Repeat step 14 twice
  16. Pour all of the egg mixture into the simmering apple puree and mix vigorously, keeping the whole thing over a heat source
  17. Put up the heat to medium and keep whisking, eventually it will boil
  18. Once the mixture boils, keep whisking until it thickens and becomes smooth, but not too thick that it doesn't come off the spoon, set aside to cool completely
  19. Chop the pink ladies in half and core the apple
  20. Chop half of the apple into small cubes for filling and the other half into thin slices for decoration. Put all apple into lemon water to prevent it from yellowing 
  21. Once apple custard has cooled, mix the apple cubes with apple custard and spread an equal amount in between each genoise sponge layer 
  22. Whisk double cream until stiff and layer the entire cake with cream 
  23. Decorate the top with apple slices into the shape of a flower (simply lay one of the apple on top of each other in a spiral fashion)
  24. I also chopped some grapes in half to cover the edges of the cake on top, but that is purely for aesthetic purposes


Wednesday 24 October 2012

Caramel and caramel sauce

Caramel is basically the combination of sugar and water. The actual method is very simple, but getting it right can be a little bit tricky. The only things you need are white granulated sugar and water and a stainless steel saucepan and of course a heat source. The amount of ingredients you need is purely based on how much you need.

Ingredients (caramel)
This is actually the Mary Berry recipe, but I've included a couple of things to make process easier from experience.
  1. 160g white granulated sugar
  2. 6 tbsps cold water
This recipe is enough for 6 creme caramels or caramel sauce to serve about 5 people depending on what you're using it for. So, to make the caramel, follow the very simple recipe:
  • Fully dissolve sugar in water over low heat with a wooden spoon until you can longer feel any sugar in the water
  • Take spoon away from saucepan once sugar has dissolved and KEEP IT AWAY!
  • Turn up the heat until the mixture boils (DO NOT PUT SPOON BACK IN OR STIR AT ALL!!!)
  • If you want to evenly distribute the heat over the whole saucepan, gently lift saucepan from one end and swirl carefully over heat source
  • The mixture should continue bubbling, just keep heating and it will go from clear to light yellow to amber
  • We want an orangey hue to the amber colour (light yellow will be very sweet and there won't be too much of a flavour, and too dark, then the caramel is burnt and will taste very bitter)
  • When you're making this for the first time and not sure what colour you're expecting, take a metal spoon and dip it into the side of the saucepan and then put the caramel on a cold surface (preferably something you don't want like a piece of white used parchment paper), the perfect caramel should be a fairly dark amber colour and quite viscous and will solidify quicker than the lighter ones
  • When it's at the right colour, quickly take the saucepan off the heat source and add a tsp of cold water to the caramel (the caramel will continue to darken for a little while when you take it off the heat, so it needs to be cooled rapidly to stop it from going bitter. Some people put the entire saucepan into a pool of cold water, but I find putting a tsp of cold water directly into the caramel to work better and actually stops the burning altogether)
  • Now you have the perfect caramel, but note caramel harden quite quickly, so you will have to be quick and decide what to do next 
Caramel sauce
You will have to make the caramel first, surprise surprise! You will also need:
  1. 80ml double cream
  2. 60g unsalted butter
  • Heat up double cream until it is hot, but not boiling
  • Chop butter into small cubes
  • DO NOT add cold water into saucepan once your caramel has reached the right colour
  • Switch the heat on caramel right down
  • Sift double cream directly into the caramel (Be very careful as the caramel and double cream can bubble up and go everywhere and can splatter) 
  • Keep mixing until caramel and cream have combined well
  • Take off the heat and pour the sauce into a clean bowl and add butter cubes into the hot sauce
  • Mix well until all the butter has melted and mixed in 
  • Leave to cool down and thicken, the sauce should be thick enough to be piped once it is set


Monday 22 October 2012

macarons


Ingredients (about 70 plain macaron shells):
  • 160g ground almond 
  • 160g icing sugar
  • 140g egg white
  • 130g caster sugar
  • 1 tsp vanilla extract
  • 4 drops or so of liquid food colouring, unless you are using powder, don't go excessive on it, or it will ruin the consistency (use paste if possible)
  1. Sift and weigh ground almond and icing sugar and mix with a spoon until everything has been mixed 
  2. Whisk egg white with an electric whisk until soft peaks and add 1 tbsp caster sugar at a time whilst continuing the whisking until all the the sugar has been added and dissolved. Continue whisking for a few more minutes until the meringue is stiff and glossy
  3. Pour almond/icing sugar mixture, vanilla extract and colouring into the meringue (if you are any particular flavouring, now would be the time to add it)
  4. Start by gently folding in the dry ingredients into the meringue until combined, then the mixing can be speeded up slightly to get even distribution of the colour, but slower mixing the better to prevent removing any trapped air in the egg white
  5. Keep mixing/folding until mixture JUST falls off spoon and mixture from the side of the bowl runs back to the centre slowly 
  6. Pipe it onto a baking parchment on a baking tray, I do the size of a 2 pound coin, make sure they have good volume as they will flatten when tapped and they only rise a little, always do an odd number, you'll see why in a bit
  7. Tap baking tray on the table to remove trapped air and flatten the mixture, if you still have small peaks after tapping, that means you haven't mixed the batter enough
  8. Leave the piped mixture at room temperature in a dry(ish) room until soft shells have formed on the macaroons 
For chocolate macaron shells, reduce ground almond by 6g and replace with 6g of sifted coco powder.

How do you know whether you macarons have formed a good enough shell? Use the tip of a dry finger and poke a macaron shell. It should not stick at all, and also, you should see cracks form around the area where you poked it. This is the shell you've just sacrificed for testing, that's why I told you to pipe odd numbers. 
  1. Bake for 150 degrees C for 15-20 minutes (I'm afraid this is very oven dependent, best way to test it is to see if the top shell has become crisp
  2. Take it out of the oven and see if you can lift the macaron off the parchment paper without it sticking, you have to be quite gentle with this. If it sticks, put it back in the oven for another  two minutes
For filling
I used chocolate ganache, so this really is a very generic recipe, for chocolate ganache, you can read my other blog posts. Similarly, buttercream also works really well. 

This recipe is practically foolproof (I hope), great texture and a lovely shine on the surface. Again, HAPPY BAKING!

Helpful tips
  • If you have not mixed the meringue with almond enough, then your mixture will be quite stiff and looks like it is full of big lumps
  • If you have over mixed the meringue with almond, then your mixture will be VERY runny, unfortunately at this stage, you can only put it in the oven and hope for the best, but don't get your hopes up
  • Always add colouring and flavouring last to avoid changing the consistency of your mixture
  • Absolutely make sure the shell has formed on the macarons, or it WILL crack when you bake them


Thursday 18 October 2012

Fraisier


The fraisier cake, it's a beautiful cake, sometimes I think they look better than they actually taste, call it personal preference. It's not actually very difficult to make as long as you follow the instructions perfectly. 

Ingredients (genoise sponge):
  • 4 large eggs
  • 125g self raising flour
  • 125g caster sugar
  • 50g unsalted butter
  1. To make the sponge, pre-heat oven to 180 degrees C
  2. Grease and line 9 inch baking tin with baking parchment
  3. Weigh out the butter and warm it in the microwave until melted, set it aside and let it cool down for 20-30 minutes 
  4. Sift and weigh flour and set aside, we'll come back to this
  5. Heat water in s saucepan until it starts to simmer and keep it on a low heat
  6. Put the eggs and sugar together in a large bowl and gently whisk to break eggs and incorporate the sugar
  7. Put the bowl containing egg/sugar mixture over simmering water and beat with hand held electric whisk continuously at high speed until the mixture has at least tripled in volume and leaves a trail of ribbon. This can take about 10-15 minutes of continuous whisking, so, be patient (if you have a stand up whisk, put it on high speed and let it whisk away until again, you see a trail of ribbon)
  8. Add in the butter to the egg mixture from the side of the mixing bowl and whisk for 1 minute at medium speed
  9. Add a third of the flour into the egg mixture and fold it in
  10. Add the rest of the flour and fold in the rest very gently 
  11. As soon as everything has been mixed, immediately pour cake mix into baking tin. 
  12. Bake for 35-38 minutes and start preparing the fillings 
  13. The surface should turn golden brown and sides start to shrink away from baking parchment
  14. Cool in tin for 5 minutes and then take it out and cool on a wired rack 
  15. When cooled, slice the cake horizontally into 2 thin sponges 
  16. Line the tin with baking parchment and put one sponge back in the tin
Ingredients (strawberry jam) 
  • 40g caster sugar
  • 200g strawberries
  • 2 leaves of gelatine
  1. Wash and chop strawberries into thin slices
  2. Soak gelatine in cold water for 5 minutes
  3. Heat strawberries with sugar until it simmers and the mixture begins to go watery
  4. Cut up the gelatine into small pieces and add to the strawberries and mix well
  5. Heat for further 3 minutes
  6. Leave it to cool down
Ingredients (mousseline)
  • 175g caster sugar
  • 4 large eggs and 2 large egg yolks
  • 120g cornflour
  • 600ml milk
  • 1 and a half tbsp vanilla extract
  • 80g unsalted butter
  1. Beat sugar and eggs together until it is a pale yellow colour 
  2. Mix in cornflour into the eggs until it resembles a lose paste consistency
  3. Heat milk until it simmers and pour a little bit at a time into eggs and continue whisking the whole time
  4. Pour eggs/milk back in saucepan and put it on medium heat and whisk the whole time until it has thickened
  5. Add the butter in small chunks and incorporate into the custard
  6. Add the vanilla and fold it in 
  7. Set aside to cool
Ingredients (chocolate ganache)
  • 70ml double cream
  • 40g plain chocolate
  • 30g muscovado sugar (if not, any sugar)
  1. Heat cream and sugar together until simmer, set aside to cool for 2-3 minutes
  2. Pour hot cream onto chocolate and melt it, whisk with spoon until chocolate has completely melted
Assembling
  1. Put one half of sponge at bottom of tin
  2. Spread strawberry jam over the sponge
  3. Cut strawberries in half and line them on the side of the sponge (inside of strawberries facing out)
  4. Pipe half of mousseline over the bottom sponge and place a layer of strawberries on it
  5. Pour cooled chocolate ganache over the strawberries
  6. Place remaining mousseline over the strawberry/chocolate layer, pipe mousseline over the strawberries on the side too
  7. Place 2nd sponge layer on, use your palm and push down gently to push the mousseline to cover the gaps between strawberries
  8. Spread remaining jam on the 2nd sponge
  9. Place a thin rolled up marzipan on top
  10. Decorate with strawberries and chocolate

Helpful tips
  • Weigh out all genoise ingredients before you put egg/sugar mixture over simmering water, as you cannot stop whisking to weigh the other ingredients halfway through. And if you do that at the end after the eggs have built up the volume, then it can de-flate before you got the flour weighed out
  • Warm the butter first thing, you want it to be completely cool before adding it to the cake batter
  • Useful to have marzipan at room temperature when rolling it, or it will be quite hard
  • Some people add the cornflour directly into the milk, don't do that, it's much harder to get rid of the lumps in the flour in such a large volume of liquid, do the mixing with the egg
  • Once eggs have been added to hot milk, you MUST stir continuously and rather vigorously! 
  • Useful to have a ruler to hand to measure how big your cake is so you can cut out your marzipan accurately (I didn't, hence my marzipan was much bigger than my cake)

Tuesday 16 October 2012

Layered tropical fruit chiffon cake


What is the point of a chiffon cake when you can have a much richer buttery sponge which is full of flavour? Well, the chiffon cake on its own doesn't contain much flavour that's right, BUT, it is excellent a brining out other flavours. Any flavour from the fillings, whether it is cream, mousse or fruits, they won't have the flavours from the sponge to compete with. Also, because the fat ingredient is oil instead of butter, it remains moist in the fridge for 2-3 days and can be kept frozen much better than the traditional victorian sponge.

This particular cake consists of 2 separate sponges of different size. If you count each sponge is sliced into two for fillings in between, then it has 4 layers. But it looks like it has two, but call it what you want, 2 layers, 4 layers, what difference does it make?!

Ingredients for the sponge (enough for two sponges in 20cm tins. It may be easier to make one 20cm and the other slightly smaller, but if you have two tins of the same size, trim down one to make it smaller)
  • 225g self raising flour
  • 300g caster sugar
  • yolks from 6 large eggs
  • whites from 7 large eggs
  • 2 lemons
  • 120ml vegetable oil
  • 1tbsp baking powder
  • pinch of salt
  1. Pre-heat oven to 170 degrees C and grease 2x20cm (or 1x23cm and 1x18cm) baking tins, do NOT line with parchment paper
  2. Sift self raising flour and 250g caster sugar together into a large bowl (This bowl will have to be very big, as you will be folding the egg whites in later)
  3. Mix with baking powder, salt and finely grated lemon rind from 2 lemons until all the dry ingredients have been equally distributed
  4. Add in vegetable oil, juice from 2 lemons and egg yolks and beat until well combined
  5. Beat egg whites in a separate bowl, make sure the bowl is free from any grease, or it will reduce the volume that the egg whites can form. Beat until soft peaks and then add in the remaining 50g caster sugar, 1tbsp at a time until the egg whites have formed STIFF peaks
  6. Add 1/3 of egg whites to cake mixture and gently fold it in, then add another 1/3 and fold and then the remaining 1/3 and fold. Make sure the egg whites and the cake mixture is well combined and there are no large areas of egg white on its own
  7. Divide cake mix into the 2 baking tins and bake for 55-65 minutes
  8. Test whether cake is cooked through with skewer, it should come out completely clean
  9. Cool by turning the tin upside down for 1 hour
  10. Slice each sponge into 2 layers so you can put filling in-between
Ingredients (mousseline filling)
  • 300ml double cream
  • 50g unsalted butter
  • 50g caster sugar
  • 2 eggs
  • 3 tbsps corn flour 
  • 250g melon chunks
  • about a bowl of mango and pineapple chunks
  1. Blend your melon chunks and put on low heat until it simmers
  2. Beat the eggs and sugar together until well mixed, smooth and silky
  3. Beat in corn flour into the egg/sugar mixture until smooth
  4. Pour 1 tbsp of simmering melon puree into the egg whilst beating the mixture continuously to prevent the eggs from cooking and forming lumps. Add another tbsp of melon puree and repeat the procedure two more times 
  5. Pour all the egg/caster sugar/corn flour mixture into the melon puree and mix continuously until the mixture boils and keep stirring for 4-5 more minutes after that, the mixture should thicken considerably at this stage, it should be thick enough for you to pipe, or it will run off the cake!
  6. Remove from heat and cool to room temperature
  7. Spread just over half of the mousseline filling onto the bottom sponge
  8. Chop mango and pineapple chunks into small cubes and layer half of it onto the mousseline filling
  9. Whisk double cream until it forms stiff peaks using an electric whisk
  10. Spread double cream ontop of the fruit and put on the second layer
  11. Put 2 tbsp of mousseline filling ontop of the second layer and lay the 1st of the 2 smaller layers on it
  12. Repeat the same filling step for the smaller sponge and put on the final layer
  13. To decorate, I used leftover mousseline and whisked double cream and decorated with mango and pineapple chunks, but I'm sure you can be more creative than me, so decorate away!


Sunday 14 October 2012

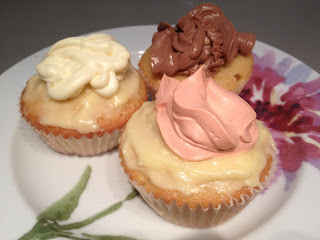
Just cupcakes?

Everyone would have had a cupcake sometime during their life and in most cases, the cupcake really is about the icing and decorations you put on it. I am no decoration expert, in fact, if anything, the exact opposite of an expert (as you can see from my piping above). This is in fact, a piping disaster, as Paul Hollywood would probably say, calling this a disaster would be a humiliation to disaster. But I swear to god, the taste of this is divine, promise!

Ingredients (for 12 cupcakes):
  1. 100g unsalted butter at room temperature
  2. 150g self raising flour
  3. 130g caster sugar
  4. 3 tbsps milk
  5. 2 large eggs
  6. Finely grated lemon rind from one and a half lemon
  • Pre-heat oven to 180 degrees C, or 160 fan
  • Combine sugar with butter briefly, so the butter is equally incorporated later on
  • Sift flour and add the milk and lemon rind to the mixture and again briefly combine the ingredients
  • Add one egg and mix briefly and then add the other one until mixture becomes smooth. Take care not to over mix
  • Add equal amount of mixture into 12 paper cases and into the muffin tin and bake for 25-30 minutes. The surface of the cupcakes should turn golden brown 
  • Take the cupcakes out of the oven and out of the baking tin and leave to cool for at least 2 hours to make sure it is completely cooled
  • In the meanwhile, prepare the icing
For the icing, it is really up to you what to add. In this case, I made lemon buttercream, rose cream and chocolate cheese cream (or chocolate cheesecake if you prepare this nomenclature). 

Rose cream
  1. Whisk 50ml double cream until firm peaks have formed
  2. Add 20g icing sugar, just enough colouring for your desired colour (I used red as it fits rose flavour right) and 1 tsp rose water
  3. Fold in the icing sugar, rose water and colour until well mixed
Lemon butter cream

  1. 50g unsalted butter
  2. 50g icing sugar
  3. finely grated lemond curd from half a lemon and 2 tsp of lemon juice

Chocolate cheese cream
  1. Melt 50g plain chocolate over simmering water and cool to room temperature
  2. Mix with 100g cream cheese and 50g icing sugar until combined


Wednesday 10 October 2012

Cappuccino cake

This is a classic sponge cake, amongst one of the easiest but also delicious cakes to make. I normally make and eat this when I need to stay up, but don't really fancy coffee. This cake is marvellously buttery and rich in flavour, goes very well with a cup of tea as per always. 

Ingredients:
  • 175g self raising flour
  • 100g unsalted butter
  • 250g golden caster sugar (sometimes I play around with the sugar a bit, 200g caster + 50g icing sugar also works very nicely)
  • 4 medium eggs
  • 1 heaped tsp baking powder
  • 50g coco powder
  • 50ml milk (full fat or semi-skimmed)
  • hot water 
  • 1 tsp of coffee granule
  • 250ml double cream
  1. Pre-heat oven to 180 degrees C
  2. Line the bottom of 2x23cm (9 inch) baking trays with baking parchment and grease the side of the tins
  3. Weigh and dissolve coco powder with enough boiling water to make a smooth, thin and runny paste (no more than 8 tbsps)
  4. Let coco paste cool down (this should be fairly quick, no more than 20 minutes)
  5. Add sugar, butter, self raising flour, baking powder to coco paste and mix gently
  6. Add 1/3 of milk at a time to the dry ingredients and mix continuously
  7. Add 1 egg at a time to the mixture and mix very gently until just combined, repeat until all the eggs have been added, careful not to over mix. The mixture should be smooth and just run off the spoon
  8. Divide the cake mixture equally into the two baking trays and bake for about 30-35 minutes
  9. Test whether cake is baked with a thin skewer/sharp knife, the blade should come out completely clean
  10. Let cake cool down slightly for 10 minutes in the tin and remove baking parchment from the cakes and let it cool down completely before spreading the filling (I leave it to cool down for at least 90 minutes to 2 hours to make sure it's completely cold)
  11. To make the filling, whisk double cream until stiff peaks (Make your life easier here by using an electric whisk, unless you want to train your arm muscles, which defies the whole point of eating cakes and enjoy yourself altogether)
  12. Use enough hot water to dissolve coffee granules completely (1-2 tsp) and let it cool down for 5-10 minutes
  13. Add coffee to whisked cream and fold it in completely, if you find the taste too strong at this stage, you can add 1-2 tsps of icing sugar and fold it in with the coffee into the cream
  14. Use half of the cream for the filling and the other half on the top
  15. Dust the surface with coco powder, I like to have a bit of chocolate on top, so I chopped up a little bit of plain chocolate and sprinkled them on the cake to decorate. Similarly, marshmallows also work well
This cake should be very easy to make, but you also risk having so much coffee and coco powder during the baking procedure and keep yourself up all night if you are doing it in the evening. Tip, taste coffee cream as little as possible if you intend to go to bed soon after finishing the cake! 

Friday 5 October 2012

Chocolate lemon tart

Lemon and chocolate is not the first combination that you think of. It's normally chocolate and orange, chocolate and raspberries or strawberries. But, dark chocolate does neutralise the overpowering tanginess from the lemon in my opinion. This is a very straightforward recipe, so I hope you will have fun making this. 

Ingredients 
(pastry)
  • 175g plain flour
  • 100g unsalted butter
  • 30g icing sugar
  • 1 large egg yolk
  • 1 tbsp cold water (optional)
Lemon filling
  • 3 lemons
  • 100ml double cream
  • 4 large eggs
  • 160g caster sugar
  • 10g dark chocolate chips or finely chopped chocolate
Chocolate filling and truffles
  • 150g dark chocolate
  • 130ml double cream
  • 40g caster sugar or muscovado sugar
  1. Pre-heat oven to 200 degrees C
  2. Mix butter, icing sugar and flour together until the mixture reaches breadcrumb consistency, do it by hand or mixer, easier by mixer, but I don't have one, it's also easily done with your hand. Just use the tips of your fingers to rub the ingredients together 
  3. Add in egg yolk and mix again, knead the dough until it is smooth, but do not over knead (use as little water as possible to get the smooth consistency)
  4. Roll out pastry between two cling films or on a lightly floured surface to prevent sticking to table and rolling pin, try to get the pastry thin. I prefer the floured surface method
  5. Put pastry into tart tin, this is a very nice pastry to work with, if you get a hole in the pastry, simply rip off some pastry from the edge and fill up the hole
  6. Use a fork to make some holes on the bottom of the pastry to prevent it from rising
  7. (Optional: chill the pastry in the fridge for 20-30 minutes)
  8. Cover the pastry with baking parchment and fill inside with baking beans, try to get some baking beans on the side and cover the middle entirely, this will prevent the pastry from collapsing from the side and rising from the bottom. Also, the baking beans will distribute the heat evenly across the bottom of pastry
  9. Blind bake for 15 minutes
  10. Take out pastry and trim off the edges with a sharp knife, put it back in the oven for another 15-20 minutes, or until the bottom of pastry is firm and dry
  11. Remove baking beans
  12. Bake for another 10-15 minutes at 200 degrees C, the inside of the tart should start to turn golden 
  13. Take tart out of oven to cool down to room temperature
  14. Meanwhile, prepare lemon filling and switch oven down to 180 degrees C
  15. Mix finely grated lemon rind and juice from 3 whole lemons, eggs, caster sugar and cream together until it forms a smooth mixture. Now sprinkle in the chocolate chips and mix it with filling (Alternatively you can try and see if you can decorate some pattern of chocolate, problem is it will melt and lose some of it shape
  16. Fill up the cooled down pastry and bake at 180 degrees C for 30-35 minutes
  17. Take it out of the oven and cool down to room temperature
  18. Once the lemon filling has cooled down, prepare chocolate filling, the is essentially a chocolate ganache, heat double cream with caster sugar until boiling and remove from heat for 2 minutes to cool down
  19. Pour hot cream into dark chocolate and mix with spoon until it is all melted and shiny
  20. Pour half of it over the lemon filling and leave the rest at room temperature to cool down, then put it with a cling film over the top into the fridge overnight
  21. Use a metal tsp to scoop out chocolate ganache and roll into a ball and dust with coco powder and decorate the top of the tart
  22. Dust top with a bit of lemon rind and icing sugar
Finished! It takes a bit of time, but it is VERY easy to make!

TAKE CARE WITH THE FOLLOWING:
  • Make sure the bottom of pastry is dry before you take away the baking beans, or it will rise once you take them away 
  • Once you have baked the filling for 25 minutes, start to observe the filling as if it over bakes, the filling will start to shrink away from the pastry on the side
  • Orange does go very well with chocolate as many of you would know, so, if you do use orange, use orange juice from 1 orange only, but use the orange zest from 2 whole oranges instead, if you use more orange juice than this, the filling will get very very wet, use the zest to bring out the flavour